Saturday, January 30, 2010

On the Economics of making Charcoal

(This offering harkens back to yesterdays posting)
polymarkos commented

"I ... chose charcoal simply because I can make it for little more than the labor."


We consume a LOT of charcoal here when iron smelting, in the order of 50 - 100 kg per individual smelt event. DARC has been extremely fortunate that ROYAL OAK has donated several skid loads of charcoal to us over the years. We just would not be able to continue our experimental series without this kind support.

I have used charcoal from a number of commercial suppliers over the years. The very best was supplied by a local small scale operation : Bruce Cowen's Black Diamond Charcoal. Bruce was interested in charcoal production from wood lot debris the same way I am interested in iron smelting. He had designed a small retort a bit bigger than a water heater which, although simple in construction, was returning something like 90 % charcoal from wood by volume. His product was excellent quality, bone dry, and he even pre screened the material to the correct size for our uses! Unfortunately, Bruce ran afoul of the Ontario Ministry of the Environment, who shut his charcoal operation down. Too much smoke being generated. Blame a neighbour?
The worst was 'Cowboy' brand, I believe not available in Canada, which was used for Early Iron 2. This was made from used hardwood railway ties. It was inconsistent in both size and quality. Often there were large pieces not even converted from the source wood. We were pulling out rocks the size of a fist and rail spikes from the bags.
The weirdest was the material used for Early Iron 3 (I can't remember the brand name). This was a brand imported from Brazil, charcoal made from mix rain forest trees. The wood started as trees being cleared to expand pasture land. The bags made great note of the 'environmental' aspect of the source. (Frankly, better not to cut the rain forest down in the first place.) I found that this material was just inconsistent in terms of species, with both hardwood and softwood mixed. The tropical hardwoods did produce good temperatures, but seemed to create more ash than what is typical from the usual mixed oak and hickory used for North American charcoals.


The comment from 'polymarkos' relates back to making your own charcoal. Smelting gurus Sauder and Williams make their own, using a retort made from a converted garbage dumpster. Lee does live back in the hills, and will pretty much fill the hollow with smoke when the thing is running. Key to the economy (and consistancy) is that they can get free offcuts from a local hardwood trim mill. They have less labour on the preparation and no real cost (gas money) for the material.

We did look into making our own charcoal here at Wareham.
First thing, although I do live in the country, my home is only an acre lot, so I can't cut my own wood. I would have to purchase the wood, which I can get as quartered fire wood. The cost of this material (Fall 2009) is roughly $275 = $300 CDN per bush cord (delivered).
Now, assuming you did not loose too much in the conversion process, the pile does not change much in terms of actual volume - its the raw weight that changes. This as the water and other volatiles are driven out during the baking process. To effectively get uniform charcoal production all the pieces of wood need to be uniform sizes. This would mean axe splitting all that wood (delivered as quartered tree trunk sections) down. My best guess here would be to pieces roughly the size of your wrist. Starting with a pile 4 feet wide, four feet high and eight feet long, that process alone would certainly take me a day or two. (Frankly, I've never spit that much wood in one solid go.)
Admittedly, if you owned your own bush lot, the ideal material for making charcoal would be the branches from those trees you felled when cutting your winter fire would only. There would be a large reduction in labour, cutting to long lengths and mainly the effort of gathering the stuff. ( Utilizing this 'waste' wood was what got Bruce Cowan interested in the process). But as I said, I don't have access to a wood lot.

Now, I can't really comment personally on the charcoal making process. I do know that any charcoal kiln or pile requires constant monitoring and adjusting during the process. This to control the amount of air / oxygen available inside. To much, and the wood simply ignites and burns away. Too little and there is not enough heat available to keep the charcoal smoldering and driving off the volatile components. My friend (and another iron smelter) Mike McCarthy has done simple covered stack charcoal burns. He reports " We burned about 3/4 of a cord of wood, and produced some 17 bushels of good useable charcoal." in a process taking three full days. He gives this amount as enough to run two full iron smelts (so that would be about 200 kg of charcoal) Based on Mike's direct experience, that full bush cord would expect to create about 260 kg charcoal.

At retail the cost (locally, Ontario, from a bulk supplier) I pay $15 per 8 kg bag. So that same amount would be costing me about $500.

So compare - self made at $300 plus five days work : against purchased at $500 plus two hours drive.
Friday, January 29, 2010

On Fires, Colours and Fuels

As many of you know, as well as maintaining a (huge) web site, posting regularly on two blogs, I participate on a couple of internet discussion groups*. Generally those come to be dominated by people who speak loud, but perhaps might not have the best understanding or experience. Sometimes, I just can't stand it (surprised?).


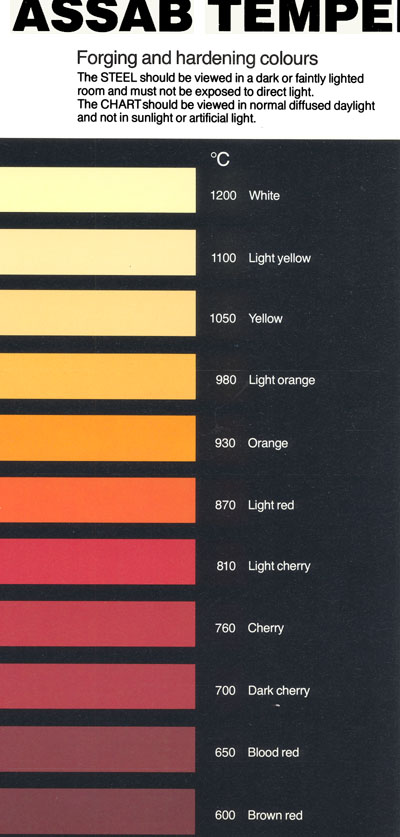
I would ask those reading this to refer to the industry standard 'heat colour to degree' chart I posted on my own iron smelting web pages.

You notice that it is in Celcius. This itself is a bit problematic, as working smiths typically only use colour references in the workshop. It also says that the chart is to be viewed in 'normal diffused daylight' (what ever the heck that is). This is critical, as the available light determines the observed colour significantly. If you were in sunlight, you would not even be able to perceive temperature colours below about 760 on the chart. I work inside, in a light controlled shop. If you have visited any working or historic shops, you always find them with few windows, so the lighting is constant and controlled (and thats why). Personally, I also wear dydymium safety glasses, which pretty much knock my observed colour back one grade off the chart. I primarily fire coal and propane, with some work with charcoal.
I don't cut the colours the way this chart does. If you consider paint colours (ie - you never had someone else say 'thats red') you would see that 980 is really a yellow, 870 is really an orange. Remember most the current generation of smiths (now the 'last generation', I've been at this a while) were largely self taught (in North America anyway). So our knowledge is based on direct experience - not what others have told us. This becomes significant in any discussion of 'best temperature to do what'.

Related to this - do NOT trust published photographs! Cameras, both digital or film, respond to infra-red light much differently than the human eye does. The typical published image will show the light from hot metal at least two grades higher than what your eye would perceive. (A good example here is the image used in this blog's title block!)

The series of red colours extends over a considerable range. Yes, you can shape a piece of metal in the red series of temperatures without damage. So by the chart I mean from 810 down as low as 600. But the amount of force needed to create the same effect at 810 is almost double that required at 930. The current wisdom is 'work smart - not hard'. People watching often wonder why I seem to create shapes so quickly. Yes, I have a lot of experience swinging the hammer. The biggest reason that I can work so fast is just working at higher (softer metal) temperatures. I normally *return* the metal to the fire at roughly 830 by that chart. (Thats a point most of beginner smiths are just *starting* to work.)

One topic that comes up constantly is 'what temperature / colour do you forge weld at'. Theoretically, if the steel surfaces are perfectly *clean* and perfectly *flat* you could weld at room temperature. If the two surfaces are in absolute intimate contact at an atomic level, the atoms will bond across the gaps. Now effectively you can't achieve this in the presence of oxygen. (Space craft have suffered 'vacuum welding' between polished surfaces.) If you are *very good* you can forge weld at lower temperatures. I have seen it done in demonstration, but frankly consider it an ego trip that misinforms novice smiths. So readers should take care when someone maintains they weld at lower temperature ranges, especially if you are seeking to learn this process. Its more a credit to the experience, rather than an example of the ideal method.
Fluxes for forge welding is a whole different topic!

Everyone keeps forgetting that the most effective working temperature also depends on the exact alloy you are working. Wrought iron is much softer than modern mild steel, even at room temperature. You can effectively move wrought iron at lower temperatures than the same mass of steel would be shaped. This is balanced however, by wrought iron's tendency to de-laminate, which means you have to bring it up for welding (to the top end of the range). My experience is that modern mild steels work most effectively in the orange ranges, so thats roughly 1000 through to maybe 850. As you select higher carbon contents, the materials become more rigid at the same temperatures. The typical method used to still get effective work undertaken is to work the metals at higher temperature ranges. The nickel / stainless and more exotic modern alloys become even more resistant to being deformed, even at the higher temperatures.

Next - heat sources:

My charcoal experience ranges from casting and forging using Viking Age equipment, and of course iron smelting.

In absolute terms, a kilogram of carbon will oxidize (burn) and create a fixed number of heat units. So a kilo of propane, charcoal or coal all creates the same temperature.
The problem in heating metal is getting that energy applied effectively to the metal involved.

First, remember that the Norse did in fact heat metal to welding temperatures - and beyond. The only fuel available to them is charcoal. So, yes, you can create all the temperature, applied to even larger objects (consider boat anchors) in a charcoal fire. An iron smelter runs at an effective 1200 C (or more) using charcoal. As has been pointed out, the design of the furnace and the volume of the air blast determine the effectiveness of heating. A hardwood camp fire is effectively hot enough to bring mild steel into the orange range, but the heat is too spread out to make it a truly effective heating method.

Someone had asked 'how fast'.
Using a small flask shaped furnace burning charcoal, you can completely melt the end of a 1 cm square bar, from cold, in about five minutes.
This is more or less a 'useless' bit of information. Just how fast a given piece of metal will heat to the effective working temperature for a given job depends on so many variables. It takes as long as it takes. (Its one of those questions anyone who regularly demonstrates in front of the public comes to hate.)

What everyone forgets is the effective COST of running various metalworking fires.
Propane is actually the most expensive of the fuels, both in terms of cost per kilogram and in terms of cost per work completed. Its advantage is that it is widely and easily available. Coal is typically the cheapest (this depending on if you can even get correct smithing coal in your region). Remember home heating coal (anthricite) is NOT the same as blacksmithing coal (bituminous).
I do purchase coal in 500 plus kg lots, and my propane as standard '40 pound' cylinders. My Chev Astro barely holds the volume of 300 kg of charcoal. (Thats a volume of just over 4 x 4 x 8 feet)
Those truly interested in this kind of comparison should look at an earlier comparison of fuel types against carbon release.

In my own home area in Ontario Canada - comparing current cost (January 2010) in CDN dollars per lb (sorry)
Propane - $0.88
Smithing Coal - $0.42
Hardwood Charcoal - $0.73
Again, these are somewhat useless numbers. My propane forge consumes roughly 2-3 times the mass of fuel per working hour as a coal fire does. Its a giant torch which remains full blast the entire time. A coal or charcoal fire is only rapidly consuming fuel when the air blast is applied, which is only when metal is to be heated. Charcoal is also requires a massive volume of fuel, as the material itself is so light. This effects the potential upper limit of the fire, as increasing air flow would just effectively blow the particles right out of the fire box.

Some argument might be made that charcoal is 'better' than propane. Its certainly not as effective in heating larger objects, or getting into the top temperature ranges. Why? Because the individual fuel particles are not very dense. You are consuming fuel so quickly, you have to constantly be adding new (cold) pieces to the fire. Try using charcoal to forge an axe, the raw consumption is massive!
I would also point out that the toxic smoke released during the production of the charcoal in the first place needs to be considered. This is 'invisible' in so much these fumes are released during the raw production phase. Out of sight, out of mind. Propane burns 'cleanest' (but this is over balanced by the much larger production of C02 per working hour - see article referenced above )

There is a reason why Europe was pretty much de-forested during Medieval times. Charcoal can be made any place you have trees, but the consumption rate is extreme, and you can cut and burn far faster than you can grow replacement trees. They did not start using coal, with all its source and transport problems, until they had pretty much cut all the trees down.


* One of these is NORSEFOLK, which is in at least it's third rendition (as the flakes overcome and drive out the serious). People were talking about black fabric, coloured sheep and dyes. And making a bit of a mess of it, frankly. I had made a comment about historic concepts being different than modern ones. I used two specific examples : The Greek references to 'wine dark sea' - and traditional blacksmithing references to 'red heat'. Two separate responses are blended and edited for use here.

Wednesday, January 27, 2010

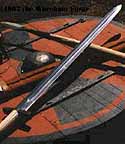
I'm not REALLY a Viking....

... I just play a Norseman at museums.

Note: This is the second in the series (from the DARC blog) giving backgrounds of the characterizations DARC members are planning to use for the LAM 2010 presentation.


There was a man named Ketill, son of Einar. He was from the west coast of
Norway, near to Trondheim. This was not the same Ketill who sailed for
Greenland with Eirik the Red, who had settled in the east and named it
Ketilsfjord.
Now as a young man Ketill Einarsson had voyaged to Ireland, to make his home at
Dubhlin. He became a blacksmith of some skill and married Bera, known as
Quickfinger for her skill at the loom. Although Ketill did well
enough at his trade, his luck was poor. Some said of him that he should
dream and plan less, and should work at the forge more. His reputation
became as a man who was quick to spend money, but slow to finish the work.
Although no longer young, Ketill sold his house and traveled to Iceland.
There he hoped his years of experience would have more value, and his
poor reputation be less known. Soon after he went to the Althing to see
if a wealthy chieftain might have need of a skillful smith. But the work
that was offered was that he considered only fit for journeymen, the
making of nails and rivets or the forging of horse shoes.
So it was there he heard the ale-told tales of Eirik and his Greenland.
He met silver tongued Ragnarr Thorbergsson and heard of the voyage to
Greenland that was being planned. Ketill was sure that his skills would
be of high value to Eirik and Leif in such a new settlement. For that
reason, the last of his silver has gone to Ragnarr to pay for passage on
the ship.

Image taken at the Icelandic Althing event, September 2009 - by Rhonda Bathurst (I think?)

Monday, January 25, 2010

Proof of other suffering - at least in spirit

Work, Darrell, Work.

Write parts of proposals.
Write descriptions of events.
Write background notes.

Convert images.
Many, many images!
Loose images inside computer someplace.
Convert images again.

Write computer code.
Lots of html code.
Test web sites.
Upload web sites.
Wait, Darrell, wait!

Make Darrell go back to work.
See Darrell sag.
Sag, Darrell, sag.
Watch Darrell's eyes go fuzzy.
Watch Darrell's brain go to mush.
Mush, mush, mush!

Drink more coffee...

So what's the point?
Vandy sent me a link this morning to :" And then I was eaten by a grue. ", a blog posting by 'eye-of-a-cat'.
Now, the topic at hand was a pile of undergraduate term pages, but I feel the pain. If you have been around computers for a very good long time, you will instantly recognize the reference - and the format.

I laughed and laughed.

Sunday, January 24, 2010

Writer or Artisan?

Gentle Readers:

Talk the Talk - or Walk the Walk?

I often find myself caught between a desire to DOCUMENT and a desire to CREATE. Obviously those reading this have some hope that there will be documentation (!). It is so often true, especially with smithing, that many who have created the best work in terms of objects, may be almost completely unknown in terms of writing about that work.

What brought this to mind has been my own labours over the last few weeks. As many (most) of you know, I am currently deep into the background organization work for two major events. DARC at LAM 2010 (August 2010), plus CanIRON 8 (July 2011). Regardless of what you might think about my artistic work, there is no doubt I do have some talent and experience for such things.

Its deep winter, and its pretty hard for me to drag me old bones out to what is basically an unheated workshop. One task that does fit well to staying close to the wood stove (and the glow of the computer) is the annual re-vamping of the web site. I did never seem to get all the 2008 work into the gallery last year, so there are a lot more bits and pieces than normal. This past year saw me work almost to exclusion on two larger projects, the Richards House Railing and the much larger Maxwell & Reade House project. (You could search the blog for many posts related to either).

So - I'm compelled to document and publish my work. (Maybe thats the problem - a foolish drive for justification?) Go take a look at what I just finished for the web site, which is the first instalment of the gallery information for the Maxwell & Reade Project on the Wareham Forge web site.

....

(back yet?)

Thats two full days work.
One day to crunch and prepare all the images from the originals. One day (today) to write the text and format it for the web.

And people wonder what artisans do with all that 'spare' time? I've been at just that for over six hours (straight) and my eyes are going buggy.

(So why the frak am I spending ANOTHER 20 minutes drafting this blog post?)

Thursday, January 21, 2010

Be serious - or don't waste my time!

I get a request like this one about every second day:
I'm looking for my camp/hunting all purpose knife. basically a knife to rely on at all times in the wilderness.

I pretty much know what I am looking for, and I would like your feedback:

I am looking for a very simple blade made of 1095, extremely robust, with an overall design inspired of a Puma Whitehunter in terms of size and balance, and a slim handle made of osage slats ...and it would be a full tang.

What do you say? Is this something you would be interested to make, and if so in which price range.
Now that request came in about mid day on the 18th. After I normally do my e-mail and computer work (in the mornings). So a fast Google for 'Puma White Hunter' got me this:

Image taken from Knife Center.com
Puma White Hunter Knife Genuine Stag Handles
10 5/8" overall. 6 1/8" stainless blade with 2 1/2" sharpened section on top edge and 1" serrated section on bottom edge of blade. Full tang. Genuine stag handles with aluminum finger guard and lanyard hole. Brown leather belt sheath.
Now, I found the listed prices available on line from various retail sellers ranged from about $290 - $330 US for new, up to $400 for older collector's offerings.

I replied (very early) on the morning of the 21st:
I see that the original is stainless, rather than your requested 1095.
I don't have the system here to add the aluminum guard. I could use bronze, that would have to be cast separately from an original master pattern.
I'm not entirely sure if I have any Osage slabs in stock, but certainly could either get some ... Osage does present certain problems due to its toxic nature. Its also not the hardest of woods, but I'm assuming you are willing to trade colour appearance for durability?

To hand forge and finish a replica of this blade in 1095 and bronze, I would be quoting more than the roughly $290 US that the commercial blade costs. Something in the range of $350 - $400 CDN.
50 % down, balance due before shipping. Shipping on top (depends on your location) Taxes as applied if inside Canada. Should remain duty free under NAFTA, but thats on your end. Payment via Paypal or major credit card (could be international money order - no cheques)
The reply to this (later that morning) was:
Thank you for the answer but I have to decline.
I commissioned a blade yesterday afternoon.

For a number of reasons - I am not pleased by this whole thing. I am going to go over just why - in the (feeble) hope that future 'customers' will consider their requests more carefully:

1) One of a kind custom pieces ALWAYS will cost more than commercial mass produced items.
Period.
- It costs more for a man than a machine.
- You are paying for the years of accumulated skill - not just the hours on this object.
- Design, set up and production problems are fixed. They apply equally to making one, or making a thousand. If it is one object, the price reflects all the time and effort. If its a thousand, then those fixed costs get divided between ALL the number produced.

2) You get what you pay for - and expect to pay for what is being offered.
- Skill costs. Quality requires skill.
- Check the past work, both in terms of quality and range of prices.
I will not make any claims here. Check my portfolio (Even just the Knife Gallery). Read my CV, or at least take a look at all the past work and experience reflected on the Wareham Forge web site. Base prices are quoted. Do the math.
If you want a duplicate of a commercial product, what on earth makes you think a skilled artisan, with decades of experience, would work cheaper than some factory in China paying slave wages?

3) You want it cheap, you want it fast, you want it good? You can only have ONE of those!
This is such a true statement, it frankly shocks me how often we all have to keep saying it. In a world full of cheap mass produced CRAP, why on earth would anyone think a one of a kind object produced in skill hands would match Walmart prices?

4) Any creditable artisan does NOT copy other work.
If what you want is a duplicate, go to the original producer. Are you trying to steal their work, and at the same time beat their prices. You may have less honour than that, but I certainly do.

5) I ain't that hungry!
Again take a look over the web site. Read this blog. Does it really look like I'm so desperate for work that I will cut rate my prices?
The circle of experienced artisan blacksmiths in Ontario is small. Don't you think we talk? Generally when someone is just trying to price shop, everyone recognizes it.

6) DON'T WASTE MY TIME!
If you have not bothered to look at the most basic descriptions as provided on the web site, why should I bother to spoon feed you?
If I can check easily on the web and find the original producer and get typical prices, who do you think you are fooling?
It typically takes me at least 15 - 20 minutes to research and thoughtfully consider a request for a quote. My time is valuable (check my consultant's rates).

The general process I use for any custom work is described in considerable detail on a carefully prepared, quite extensive article on the Wareham Forge web site : On Custom Designs

I suspect that some of those reading will be rolling their eyes (but secretly agreeing). I can't believe I have not written at length about this topic before (?)

Monday, January 18, 2010

Richards House Railing - Completed!

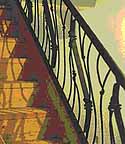
On Sunday I completed the installation on the Richards House project. As a bit of review, the work was to design and build a set of front porch railings for this Arts and Crafts style home in the Danforth and DVP area of Toronto. From the start, the design component of the work was extremely important. The desire was to match the clean lines and attention to hand crafted detail exhibited by the Arts and Crafts movement.


The second set of elements were the two panels that would run from the driveway up to the raised level of the front yard, then up the left side of the steps to the entry porch that spans most of the front of the house. Earlier, I had completed and installed the single panel up the right side of the steps, also attached near the door.

As with the right side, the diagonal up the stairs and the short tail section along the top of the porch were built as a single unit. (View from the centre of the porch)


The lower railing, which would run at 90 degrees along the brick work, was built separately. On installation, the two sections were welded together to a single unit. The blending of the two hand rails, set to differing levels and angles, would prove the most time consuming part of the installation. A small portable MIG welder was used to fix the two panels, the welded areas ground and sanded smooth before final painting.


This low to the ground view also shows the matching right side railing, installed in December.


An overall view of the front walkway up from the driveway.

The customer is extremely pleased with the completed railings. The house has had some renovation work done to it over the years, and presents clean and classic lines to the street. It was however, a bit plain looking - not really showing the care the owners had used in preserving and matching antique furnishings to the interior architecture.
The competed railings are simple in line, and obviously unique. The casual passer by might not notice the hand forged detailing, but certainly would know 'something was different'. On closer examination, the extensive forging of each element becomes clear. The design sets off the house, without overpowering it.

Needless to say, I'm extremely pleased with the overall result.

Saturday, January 16, 2010

2010 Year Event Schedule


Even this early into 2010, my whole year is pretty much blocked in!

You can find the details now posted up on the main Wareham Forge web site, under '2010 Events'
There is also a grid style overview in a glance of how my free (?) weekends are shaping up.

Wednesday, January 13, 2010

I was a Celt...

Link
What a hoot! Take a look at this great site from the BBC : Iron Age Celts

The link sent to me by fellow An Droichead member (enamellist) Catherine Crowe.

Tuesday, January 12, 2010

2010 Courses in Metalsmithing

I have been (already!) getting requests for the 2010 Course Dates. A general description of the courses and the facilities can be found at Training from the Wareham Forge.
The following are tentative at this point. They do fit the normal pattern of dates from past years:

INTRODUCTION TO BLACKSMITHING

April 30 - May 2

June 18 - 20

July 16 - 18

September 17 - 19

October 15 - 17

One change is that I have fixed specific dates from some of the specialist programs:

June 4 & 5 : Introduction to SMELTING IRON

July 24 & 25 : Basic BLADESMITHING

October 23 - 24 : Introduction to LAYERED STEELS

November 27 & 28 : Basics of METAL CASTING


The course fees from 2009 remain unchanged.

Note however that for the courses to the end of June, only GST is applied. Because of the new harmonized tax taking effect on July 1, 2010, the combined 13% is likely to apply after that date.

Book early! A deposit of $100 holds your space. Payments can be via mailed cheque, Paypal, or major credit card (via phone).

hope to see you this year.

Friday, January 08, 2010

Prorogue Parliament - Let's not come to work

For readers outside Canada:
Recently Prime Minister Stephen Harper undertook what was once an obscure piece of Canadian parliamentary procedure and 'prorogued' Parliament. This is in effect a mechanism that allows the Prime Minister to shut down our democratically elected Parliament for some specified period. The intent of the mechanism is to allow the standing government to continue to function in times of great confusion. Harper first did this last fall, largely to avoid being forced into an election after a short term. Before this the measure was last employed almost two full generations ago (the late 1920!), to give you some idea how extraordinary this is. Before fall 2009, virtually no one in Canada had ever heard the word 'prorogue'.

Harper and his Conservative Government have just employed this measure AGAIN, disbanding our Parliament until some time in March. The reasons seem little more than the Conservatives desire to avoid questions about their conduct over recent months.

This is the text of a letter I sent to my local Member of Parliament. I sent copies to the Conservative Party of Canada, and directly to the Prime Ministers Office.

I know that your focus has been primarily on issues related to agriculture, topics of central interest to many residing in Grey and Bruce. However, as has been indicated to me a number of times over recent years, in Canada we now should expect our members of Parliament to implement a * Party * platform, not necessarily the wishes of their constituents. So it is as a member of the Conservative Party that I frame my comments.

To quote a film "You were hired to do a job - and it was only a temporary job at that".
How on earth does your Party (more specifically your leader Stephen Harper) justify taking several months 'off' - just because you find it 'convenient'?
I am deeply offended by this whole action by the Conservatives, on a number of levels.

On a simply practical level:
I am quite certain, although members of Parliament are not WORKING, they are still intending on getting PAID.
I am a self employed artisan. I thus do on enjoy ANY of the social support network available to regular wage earners.

Now, when I don't work, there is no income, and I can not put food on my table. It offends me that the Conservatives have effectively decided just not to show up for work, yet still intend to take their full pay cheques.
Perhaps, because Steven Harper has prorogued Government, any member not part of the Conservative Party is being functionally 'laid off' (or perhaps better described as 'locked out')? Are they then collecting UI - like any other Canadian worker would be forced to? What kind of waiting period is being enforced? I remember when I experienced a regular 12 week seasonal layout when working at a major Ontario museum. I always faced major opposition from officers that same Federal department. Every year, I was harassed about continuing that job, just because of this annual lay off (despite making roughly three times the minimum wage of the time while working 9 months of the year).
I am personally required to collect GST on all *my* labours on behalf of the Federal Government. Curiously, although Members of Parliament are not working, I'm quite certain * I * will still be expected to collect and remit that GST - on their behalf.

On your own web site it states:

" Canada’s commitment to democracy is the source of our success as a country. But our faith in our democracy has been shaken by the political scandal of recent years and recent governments. "


Suppose there was a coup - and no one noticed?
In effect, Steven Harper has dissolved our democracy in Canada, for his own convenience. Not once, but now twice, on a yearly basis. Can't face the heat? In Harpers House, you simply kick everyone else out of the kitchen, then lock the doors.


I have been a voter since the late 1970's. In those days, you voted for the person, fully expecting them to represent the wishes of the population who elected them to office. 'Vote the Party, not the person' has become the status quo in the decades since. I have flat out been told by elected members in the past : 'Don't like it? Wait four years and vote our Party out.'
Now it seems Canadians can not even expect our elected 'representatives' to bother showing up for Parliament if it does not suit them. A democracy? It appears less and less all the time.

I, for one, will remember all this come the next election.
"We won't get fooled again"

(some useful links)

Contact your Member of Parliament

Prime Ministers Office - Stephen Harper
pm@pm.gc.ca

Conservative Party of Canada
(note: you have to use their on line form to contact them)


My good friend Steve Muhlburger had advised me to keep to a focused topic when I first started this blog, several years ago. Generally, Steve was quite right, as my general readers come here for topics related to iron, blacksmithing and the Viking Age. Every once and a while, however, something 'just pisses me off'.
PS - I did NOT vote for those guys!

Back to your regularly expected programing...

Sunday, January 03, 2010

Vinland 3 Smelt - Report Available

Vinland 3 - November 7, 2009
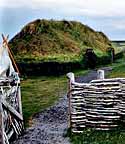
Working towards a reconstruction of the
L'Anse aux Meadows Smelt

Smelt Report

" This smelt is the third in the series working to re-create that which took place at Vinland (L'Anse aux Meadows) circa 1000 AD. This experiment is intended to be the last full systems test before the full dress rehersal (using all Viking Age tools and clothing) on June 12, 2010. To that end, one last significant historic equipment was added, a Norse style double bag bellows. The smelt sequence was based on accumulated experience, no clocks were used by the working team. "
A bit late in coming, I have completed and posted up the full report on the November smelt to the main Wareham Forge smelting documentation. It is illustrated with a number of photographs of the furnace construction, site layout and both the smelt and extraction sequence.
 

February 15 - May 15, 2012 : Supported by a Crafts Projects - Creation and Development Grant

COPYRIGHT NOTICE - All posted text and images @ Darrell Markewitz.
No duplication, in whole or in part, is permitted without the author's expressed written permission.
For a detailed copyright statement : go HERE