 This is a scale drawing of the size of the artifact tripod, with rough profiles of the cauldron actually found with it in the burial, and the (much) later copper pot from Mastermyr as a comparison.
The fire bowl below is a common re-enactors solution to the modern restriction - 'no open ground fires'. This line drawing was prepared as a discussion point for the commission piece seen below. The customer's desire was for a Oseberg styled tripod, only standing tall enough to effectively use the fire bowl diagramed.
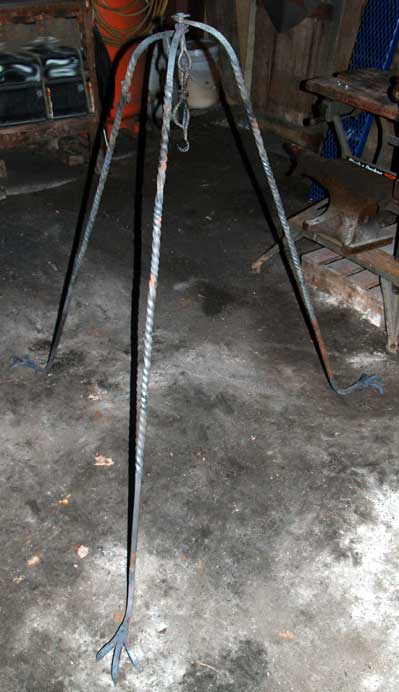
The solution was to increase the overall size of the tripod by about 30 %. I recommended that the diameter of the legs also be increased, from roughly 3/8 inch on the artifact to 1/2 square stock on the replica.
One special detail is seen with careful examination of the twists. The original artifact was created in a charcoal fire, which has a much smaller 'effective heat diameter. To mimic this, the length of the individual twisted sections was limited to 10 cm.
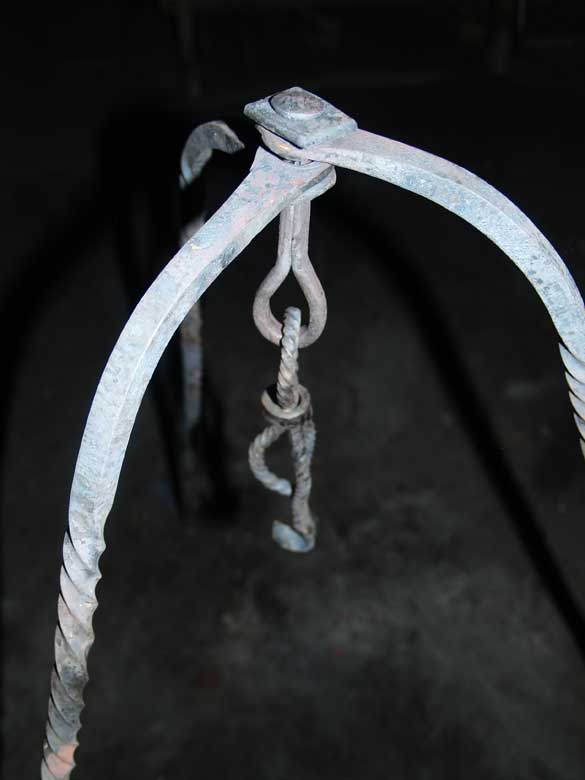 The design of the tripod is such that there is minimal possible alteration of the 'spread' of the legs. One restriction is the design of the upper pivot point. The top of each leg is curved, then upset and punched. A single looped piece is inserted through these holes, then the top of the loop is hot peened over. In my version, a square cut piece forms a simple washer. From the loop descends the orimental basket hook, these elements forge welded into a single unit.
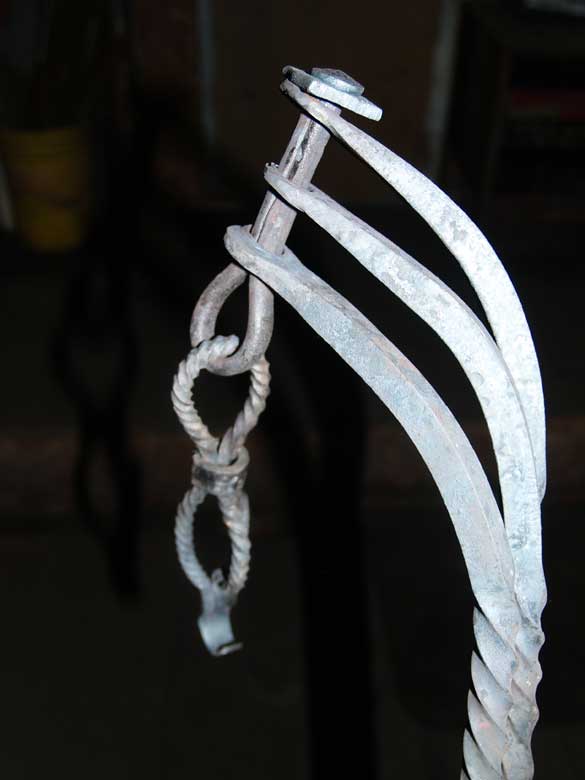
A closer look at the top elements, with the tripod legs swiveled over - 'packed for travel'. To make the loop, I started with a length of 3/8 inch round, which was forged into a bottom die to create a half round shape. This was folded back on itself and the free ends forge welded together. This end was then dressed to create the 'pin' which threaded back through the holes punched in the top ends of the individual legs.
The basket is formed from two lengths of 1/4 inch square, each twisted. The longer piece was folded back over on itself, then the three stacked ends forge welded together. After these were forged to the basket shape, a short piece of flat stock was used to make the central collar. (Note my maker's mark on the side of the collar.) Last the welded block was drawn out and shaped to the hook.
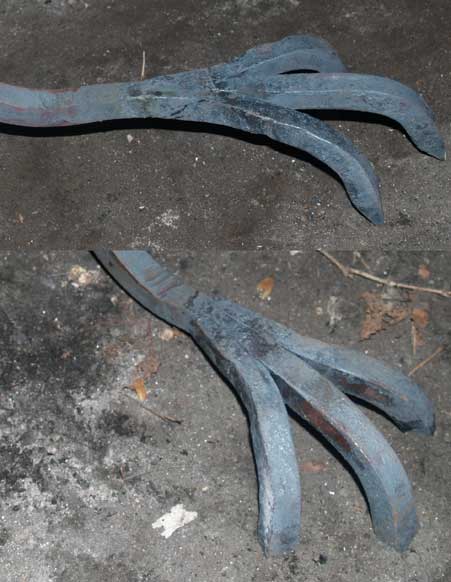 The tripod legs end in this three clawed foot. To extra short pieces were forge welded to the main upright, then curved. Note how the foot is carefully angled to that it will sit flush with the ground when the three points of the claws are driven into the ground. This is easily done by simply stepping on the 'instep'.
The angles on the foot and at its attachment to the leg are such that they conform to the angle set by the curve at the fixed top of the tripod.


No comments:
Post a Comment